This page provides a collection of templates to support the planning, implementation, and documentation of assistive technology (AT) use in inclusive learning environments. The templates offer some approaches to improving accessibility, participation, and learning. The goal is designing activities that work for all learners, with the right support and tools. It’s important to map existing technologies and materials, as well as individuals’ needs. This aligns with frameworks like SETT and HAAT for systematic decision-making. See also this manual’s Procurement and acceptance.
The first template, ”Device or tool documentation template”, helps create guides for assistive technologies used in education. Whether documenting a Braille writer, an OCR reader, a hearing assistive tool, a magnifier, or a communication device, this template supports the development of consistent documentation aligned with accessibility best practices.
The ”Other templates” section includes additional tools adapted from UNICEF’s Assistive Technology Guide for Teachers. These provide structured support for inclusive lesson planning, analyzing barriers, mapping learning activities, assessing needs, and planning AT implementation at the classroom and school levels.
- Inclusive lesson planning template
- Lesson accessibility and barrier analysis template
- Learning activity mapping template
- Assistive technology implementation plan template
- Assistive technology assessment guide
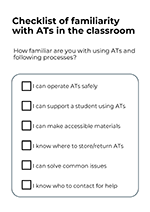
It’s also good to check familiarity regularly with using ATs and following processes. It can be an online quiz or a printable document. Here’s an example of a checklist content that can be modified freely:
- I can operate ATs safely
- I can support a student using ATs
- I can make accessible materials
- I know where to store/return ATs
- I can solve common issues
- I know who to contact for help
Get the printable checklist document (A4 size) in PDF format here.
Device or tool documentation
This template aligns with the principle that AT is used to increase access, communication, and participation in learning. However, these are suggested topics, so you can modify them as needed.
1. Purpose and intended use / what the device is for

This section explains, in plain words, what the tool does and who benefits from it. It helps quickly understand why the device matters and when to use it.
- The educational purpose of the device/tool
- Who it supports (e.g., learners with specific needs)
- How it removes barriers and enhances participation
2. Getting started guide / quick start
This is the “I have 5 minutes before class starts” guide. It shows the fastest and easiest way to make the device work right now.
Describes:
- Step-by-step setup instructions
- Basic use in classroom contexts
- Initial configuration for learners
3. Safety, accessibility and care
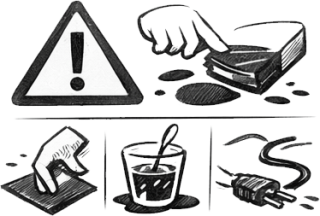 This keeps the device safe from damage and students safe while using it. It also includes accessibility considerations. Helps prevent accidents such as spills, pinched fingers, or broken cables.
Describes:
- Physical safety and ergonomic use
- Accessibility considerations
- Responsible use in digital environments
4. Key functions and features / core features
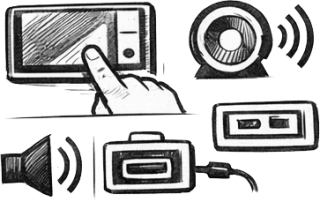
A simple list of the important functions. This prevents teachers from being overwhelmed by things they don’t actually need.
Describes:
- Main functionalities of the device
- How features support learning (e.g., text-to-speech, AAC tools)
- Accessibility options
5. Pedagogical applications / classroom use examples

These examples show teachers exactly how to use the device during lessons. They turn the device from “nice to have” into a real learning tool.
Describes:
- Practical teaching scenarios
- Examples aligned with differentiation and UDL (engagement, representation, action & expression)
- Use cases for individual and group learning
6. Data protection and privacy
 If the device stores information, this explains how to handle it safely and follow regulations. Teachers know what to keep, what to delete, and how to protect student privacy.
Describes:
- Student data privacy (e.g., GDPR considerations)
- Safe digital practices
- Permissions and consent
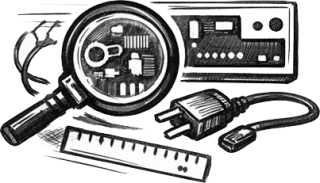
7. Troubleshooting

This information helps teachers solve the most common problems without having to call support.
Describes:
- Device or software not working properly
- Incorrect settings or accessibility features
- Connection or compatibility issues
- Difficulty using the device in class
- Support needed and solutions recorded
8. Maintenance and support schedule

This keeps devices in good working condition so they last longer and work reliably.
Descriptions:
- Routine checks and updates
- Storage recommendations
- Technical upkeep
9. Technical specifications
Short, practical specs—only what teachers actually need.
Describes:
- Hardware/software requirements
- Compatibility with other tools
- Accessibility standards
10. Support, training and warranty
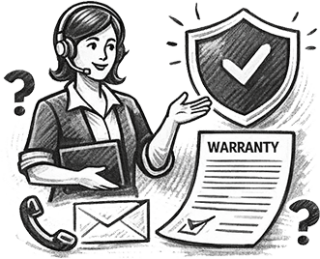
Makes it easy to know who to contact, where to get help, and what the warranty covers. Also, this includes training requirements.
Describes:
- Where to get help (technical/pedagogical)
- Training requirements for teachers and students
- Warranty/service info
11. Revision history
Helps keep track of updates and ensures everyone is using the latest version. However, revision can be hard to keep up to date if it’s not part of your processes.
Describes:
- Updates to the device or document
- Changes in features or classroom practices
Get the printable template (A4 size) in PDF format here.

Other templates and structures
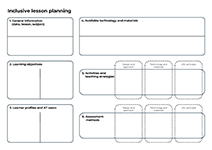
Inclusive lesson planning
To design inclusive lessons integrating AT, UDL (engagement, representation, action & expression), and differentiation. Helps ensure that technology, pedagogy, and inclusion work together.
Structure description:
- General information (date, lesson, subject)
- Learning objectives
- Learner profiles and AT users
- Available technology and materials
- Activities and teaching strategies
- Design and approach
- Technology and materials
- UDL principle
- Assessment methods
- Design and approach
- Technology and materials
- UDL principle
Get the printable template (A3 size) in PDF format here.
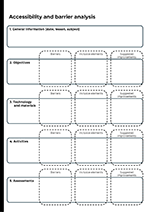
Lesson accessibility and barrier analysis
To identify barriers to participation, opportunities for inclusive design, and improvements in lesson planning.
Structure description:
- General information (date, lesson, subject)
- Objectives
- Barriers
- Inclusive elements
- Suggested improvements
- Materials
- Barriers
- Inclusive elements
- Suggested improvements
- Activities
- Barriers
- Inclusive elements
- Suggested improvements
- Assessments
- Barriers
- Inclusive elements
- Suggested improvements
Get the printable template (A4 size) in PDF format here.
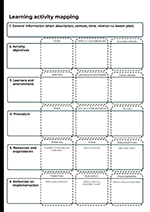
Learning activity mapping
To analyze each activity in detail and align it with UDL (engagement, representation, action & expression), differentiation strategies, and AT use. This is a move from traditional planning to designing an activity that works for all learners, with the right support and tools.
Structure description:
- General information
- Short description
- Context
- Timing of the activity
- Relation to lesson plan
- Activity objectives
- Goals
- Skills or competencies
- Success criteria
- Learners and environment
- Learners
- Learning environment
- Other details
- Procedure
- Steps
- UDL and differentiation
- AT use
- Resources and organization
- Materials (Available technology and materials?)
- Roles (Who is involved?)
- Responsibilities (Who does what?)
- Reflection on implementation
- Objectives (Were goals achieved?)
- Evaluation (What worked or what didn’t work?)
- Improvements (What to improve next time?)
Get the printable template (A4 size) in PDF format here.
Assistive technology implementation plan
To support systematic integration of AT at the classroom and school level, linked to personal learning goals.
Structure description:
- General information (description)
- Student details (name, group, institution)
- Dates (plan, review)
- Team and roles
- Team members
- Roles
- Responsibilities
- AT and setup
- AT to be used
- Status (owned, borrowed, to be purchased)
- Setup tasks (tasks, responsible person and timeline)
- Training and support
- Training needs (trainees, trainer)
- Schedule
- Follow-up
- Implementation
- Learning goals
- Curriculum area
- AT needed to achieve goals
- Monitoring and evaluation
- Goals to track
- Instructional strategies
- Data collection (methods, frequency, responsible person)
Get the printable template (A4 size) in PDF format here.

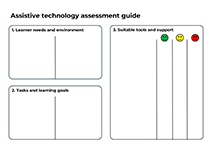
Assistive technology assessment guide
To guide the selection of appropriate AT using structured steps. Start by understanding the learner’s needs and environment, then define the key tasks and learning goals. Based on this information, identify suitable assistive tools and the support needed to ensure effective use.
Structure description:
- Learner needs and environment
- Tasks and learning goals
- Suitable tools and support
The template includes simple smiley face rating indicators to reflect how well the chosen solution meets the learner’s needs and goals.
Get the printable template (A4 size) in PDF format here.